

A self storage move-in day checklist can help you avoid last-minute problems when it is time to load your unit. Instead of arriving with the wrong lock, missing paperwork, or boxes that are difficult to identify, you can prepare the details in advance and focus on moving your belongings efficiently.
Every facility has its own rental process, access rules, and requirements, so confirm the details for your specific location before move-in day. The five steps below cover the practical tasks that apply to most storage moves, from reviewing your agreement to arranging the unit for future access.
How to Use This Self Storage Move-In Day Checklist
Start preparing several days before your scheduled storage unit move-in. Create a short list on your phone or print a storage unit checklist that everyone helping with the move can follow.
Confirm these basic details first:
Your move-in date
The unit size and unit number
Facility access instructions
Office and gate hours
Lock requirements
Insurance or tenant protection requirements
Items prohibited by the rental agreement
The vehicle, equipment, and help available for moving day
Do not assume that every location handles reservations, payments, locks, or access the same way. A quick review before you leave home can prevent delays after the vehicle is already loaded.
Step 1: Review Your Rental Agreement and Access Details

The first item on your self storage move-in day checklist is confirming that the rental is complete and that you understand the agreement. Read the document before signing and save a copy where you can find it later.
Review:
The monthly rent and billing date
One-time fees or required deposits
Insurance or tenant protection requirements
Move-out notice requirements
Access hours and entry instructions
Prohibited items
Rules for shelving, vehicles, or business use
Contact information for questions
Confirm whether the space is reserved or fully rented. A reservation may hold an available unit without completing the rental, while a completed rental may require identification, payment, signatures, and other information. The exact process varies by facility.
Also confirm how you will enter the property and locate the unit. You may receive a gate code, mobile-access instructions, a building code, or directions from staff. Save this information before moving day rather than relying on an email search while sitting outside the gate.
Step 2: Review Coverage and Create an Inventory
Storage unit insurance and tenant protection requirements vary. Some rental agreements require proof of coverage, while others may offer a protection option during the rental process. Review the terms carefully and contact your insurance provider when you are unsure whether belongings stored away from home are covered.
Ask:
Does my current policy cover belongings in self-storage?
What limits, deductibles, and exclusions apply?
Does the facility require proof of coverage?
Are certain high-value items excluded?
What documents would be needed to file a claim?
Insurance does not replace careful packing. Before loading the unit, create an inventory and photograph belongings that may be difficult to identify or replace. Record serial numbers for electronics, tools, or equipment when appropriate.
A useful inventory can be as simple as:
Box 1: Kitchen cookware and utensils
Box 2: Winter coats and boots
Box 3: Books and office supplies
Furniture: Dining table, four chairs, and dresser
Number each box and keep the list on your phone. This makes storage unit insurance documentation easier and helps you find items without opening every container.
Step 3: Choose a Compatible Storage Unit Lock
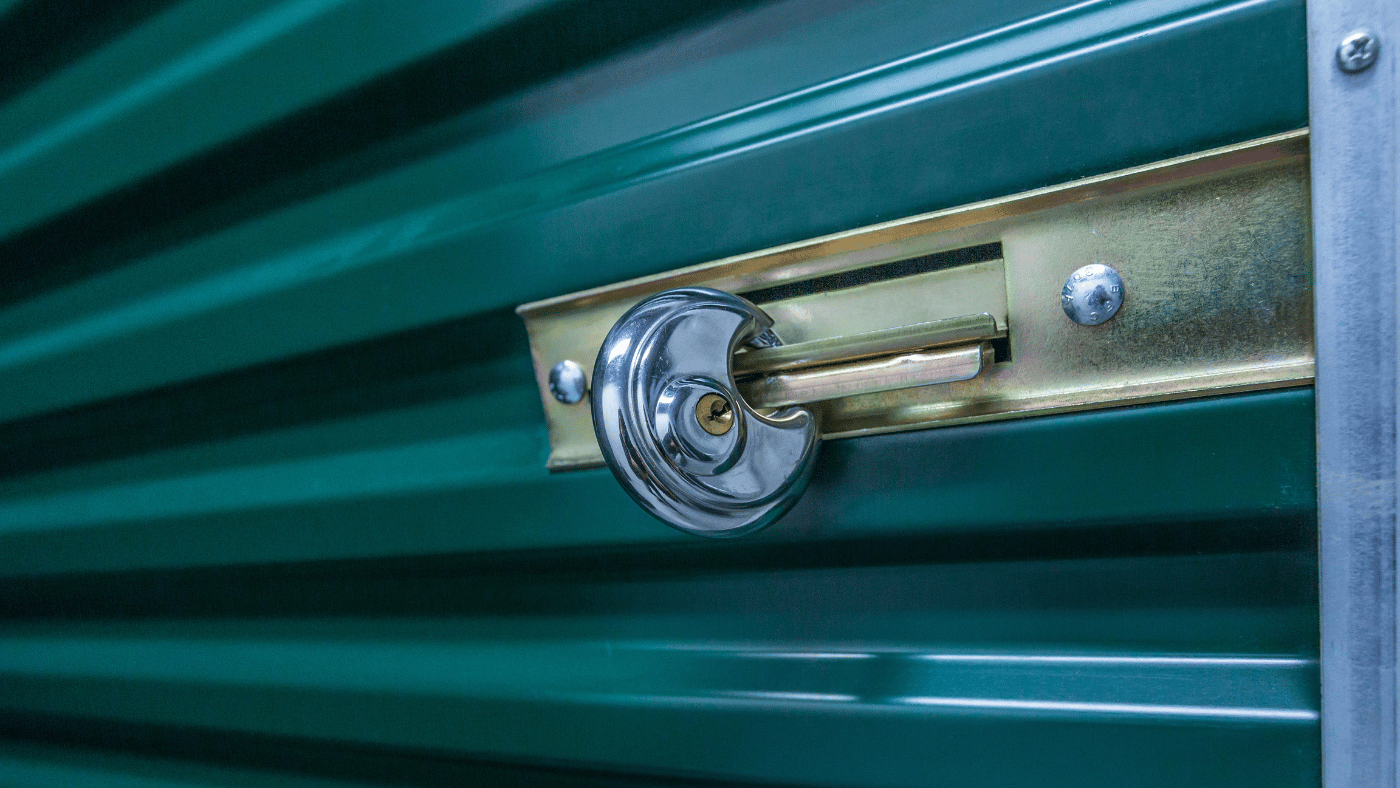
Confirm the required storage unit lock before purchasing one. Latches and lock systems differ, and some facilities use built-in or app-based access rather than a customer-supplied padlock.
When a separate lock is required, ask which types and dimensions fit the unit. Common options may include disc locks, cylinder locks, or other padlocks designed for storage latches. The right choice depends on compatibility with the door and the facility’s rules.
Before move-in day:
Test the key or access method.
Bring every required key, code, or phone credential.
Keep a spare key in a separate location when appropriate.
Label the key so it is not confused with household keys.
Confirm that the lock opens and closes without forcing the latch.
Do not leave the key inside the storage unit or pack it into a moving box. Assign one person to keep track of the storage unit lock during the move.
Step 4: Prepare and Pack Your Belongings

Packing a storage unit begins before anything reaches the property. Sort belongings, gather supplies, and decide which items should go in first.
Start by creating four groups:
Store
Keep at home
Donate or sell
Recycle or discard
Avoid paying to store broken, expired, or unwanted items simply because moving day is approaching. A quick sorting session can reduce the number of boxes you need to transport and make the unit easier to organize.
Gather supplies such as:
Sturdy boxes in manageable sizes
Packing tape
Labels and permanent markers
Packing paper or cushioning
Furniture covers
Sealable bags for hardware
Moving blankets
A hand truck or dolly, when available
Basic tools for furniture disassembly
Clean and dry every item before packing. Moisture, food residue, dirt, and outdoor debris should not be sealed inside boxes or containers.
Use detailed labels instead of writing only the room name. “Kitchen, daily cookware, open first” is more useful than “Kitchen.” Label at least two sides so the description remains visible after stacking.
When disassembling furniture, place screws and hardware in a labeled bag and attach it securely to the matching piece. Photograph the assembled item or its connections if that will make setup easier later.
A practical self storage move-in day checklist should also include an essentials rule: keep identification, medication, important documents, chargers, keys, and anything needed immediately out of the storage load.
Step 5: Load and Organize the Unit for Future Access

Packing a storage unit successfully is not only about fitting everything inside. The layout should allow you to identify belongings, retrieve important items, and avoid unstable stacks.
Before unloading, decide which belongings will be needed first. Place long-term or rarely used items toward the back, then keep seasonal, business, or frequently accessed boxes closer to the entrance.
Use these organization guidelines:
Place heavy, sturdy items on the bottom.
Keep lightweight and fragile boxes above heavier containers.
Leave labels facing the aisle.
Avoid stacking higher than you can safely reach.
Follow the weight limits for any shelving.
Leave a center or side walkway when space permits.
Keep furniture covered without sealing in moisture.
Store mirrors and framed items according to appropriate packing guidance.
Avoid leaning unstable items against the door.
Create zones by room or category, such as furniture, kitchen, clothing, seasonal items, and documents. Record the general layout in your inventory.
Take a photo of the finished unit before closing the door. It can help you remember where large items are located and show whether something was moved during a later visit.
Before leaving, complete the final part of your storage unit checklist:
Confirm that nothing blocks the door.
Remove trash and packing debris.
Check that you have your phone, wallet, keys, and tools.
Close the unit door completely.
Attach and test the lock.
Verify that the property gate or building access works.
Save the unit number and access instructions.
Common Storage Move-In Mistakes to Avoid
A few preventable mistakes can make move-in day longer or create problems later. Watch for these common issues:
Arriving before the rental is complete
Bringing a lock that does not fit
Packing prohibited items
Storing damp or dirty belongings
Making boxes too heavy to lift
Using vague or one-sided labels
Placing frequently needed items at the back
Creating tall, unstable stacks
Forgetting to leave a walkway
Packing important documents or medication
Failing to keep an inventory
Leaving without testing the lock and access method
The best storage unit move-in plan is one that accounts for both moving day and future visits. A unit that looks perfectly packed but cannot be accessed easily may create more work later.
FAQs
Complete Your Move-In with a Clear Plan
This self storage move-in day checklist helps you prepare the rental, coverage, lock, packing process, and unit layout before the vehicle is loaded. Confirm the facility-specific requirements, label and document your belongings, and organize the unit based on when items will be needed again.
A little preparation can make storage unit move-in day more manageable and make every future visit easier. Ready to begin? Explore available storage options and choose a unit that fits your belongings and moving plans.


