

The best storage solutions for outdoor gear make it easier to enjoy your hobbies without letting equipment take over closets, hallways, or the garage. Bikes, tents, kayaks, sleeping bags, coolers, and seasonal accessories all need space, but they also need different types of care between trips.
The most useful storage solutions for outdoor gear do not have to be elaborate. Start by cleaning everything, grouping similar items, and choosing storage methods that support the shape and material of each piece. With a little planning, your gear will be easier to find, pack, and return after every adventure.
Table of Contents
- Why Storage Solutions for Outdoor Gear Need a Plan
- 1. Sort Gear by Activity and Season
- 2. Clean and Dry Equipment Before Storage
- 3. Choose Containers That Match the Contents
- 4. Build a Better Camping Gear Storage System
- 5. Create Practical Bike Storage
- 6. Support Kayaks and Paddle Gear Correctly
- 7. Use Vertical Space and Keep an Inventory
- 8. Decide Whether Off-Site Storage Fits Your Needs
- Common Outdoor Gear Storage Mistakes
- FAQs
- Keep Your Gear Ready for the Next Trip

Why Storage Solutions for Outdoor Gear Need a Plan
Outdoor equipment often ends up wherever there is room. A helmet lands on a shelf, a tent gets pushed into a corner, and a kayak becomes a permanent garage obstacle. Over time, this makes it harder to find what you need and easier to overlook maintenance.
A simple outdoor gear organization plan should help you:
- Keep similar equipment together
- Prevent wet or dirty gear from being packed away
- Avoid placing heavy items on delicate equipment
- Make frequently used items easy to reach
- Use vertical space more efficiently
- Identify gear that should be repaired, donated, or replaced
Before buying shelves or containers, take inventory and measure larger items. The best storage solutions for outdoor gear should fit the equipment you own and the space you actually have.
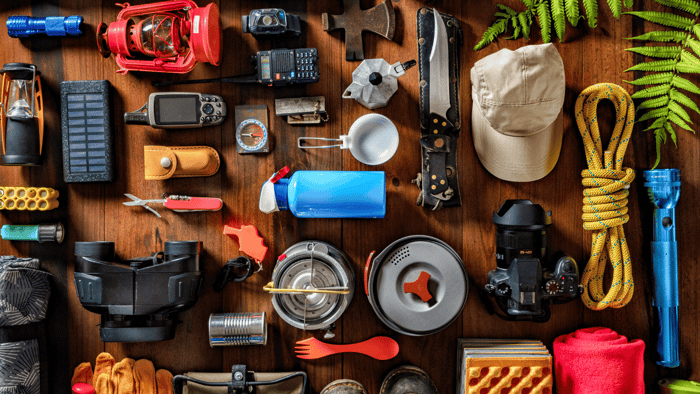
1. Sort Gear by Activity and Season
Separate equipment into categories such as camping, cycling, paddling, hiking, fishing, beach trips, or winter activities. Then divide each category by how often you use it:
- Frequent-use gear: Items used weekly or monthly
- Seasonal gear: Equipment used during one part of the year
- Occasional gear: Items kept for specific trips
- Repair or donation items: Equipment that needs attention
This prevents everyday gear from getting buried behind things you may not need for several months. It also makes seasonal gear storage easier because you can rotate equipment as your plans change.
Keep smaller accessories with the activity they support. For example, store bike lights, locks, gloves, and repair tools near the bicycles instead of mixing them into a general household bin.
2. Clean and Dry Equipment Before Storage
Mud, sand, food residue, salt, and moisture can shorten the useful life of outdoor equipment. Before storing anything, clean it according to the manufacturer’s instructions and let it dry completely.
Pay close attention to:
- Tent fabric and ground cloths
- Sleeping bags and blankets
- Camp cookware and utensils
- Hiking boots and water shoes
- Life jackets and paddling accessories
- Bike frames, chains, and helmets
- Coolers and hydration containers
Open coolers, bins, and other enclosed containers until all moisture is gone. Shake dirt from tent stakes and wipe down tools before grouping them with clean equipment.
For battery-powered accessories, follow the manufacturer’s storage directions. Removing replaceable batteries may help prevent leakage during long periods of nonuse.
3. Choose Containers That Match the Contents
Not every item belongs in an airtight plastic bin. The right container depends on the material, size, and how often you use it.
Use clear or clearly labeled bins for small items such as headlamps, camp utensils, straps, repair kits, and water filters. Dividers or smaller pouches can keep accessories from disappearing at the bottom.
Breathable bags may work better for textiles that should not remain tightly compressed. Open shelving can be useful for hard-sided gear that needs airflow and regular access.
When planning outdoor equipment storage, avoid creating bins that are too heavy to move comfortably. Several medium containers are often easier to handle than one oversized bin packed with cookware, tools, and accessories.
The right storage solutions for outdoor gear should also make equipment easy to return after a trip. Label more than one side of each container so the contents remain visible when bins are stacked.
4. Build a Better Camping Gear Storage System
Camping gear storage works best when equipment is grouped by function. Create separate groups for sleeping, shelter, cooking, lighting, and camp furniture.
After every trip:
- Clean and dry the tent, rainfly, and ground cloth.
- Air out sleeping bags before putting them away.
- Empty and wipe down coolers and food containers.
- Check cookware and utensils for residue.
- Restock commonly used supplies.
- Place items that need repair in a separate area.
Avoid keeping sleeping bags tightly compressed for long periods. A roomy storage sack or breathable bag can help preserve the loft of the insulation.
Tents should also be clean and dry, with poles, stakes, and repair pieces kept together. Check every tent bag before putting it away so small items do not get left behind at the campsite.
Create a small trip-ready bin for frequently used items such as lights, basic tools, and cleanup supplies. This can make weekend packing much faster because you will not need to open every camping container.
5. Create Practical Bike Storage
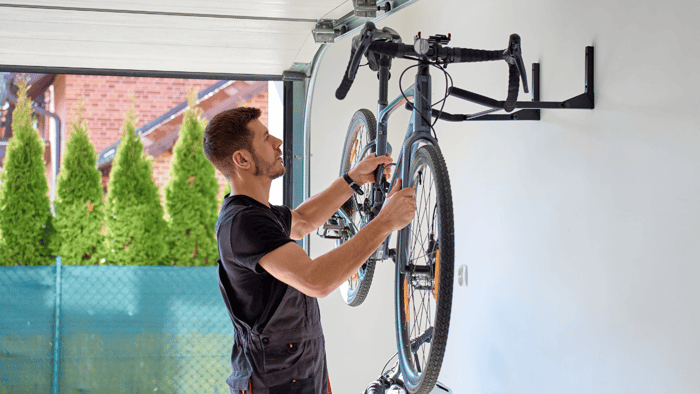
Good bike storage should support bicycles without blocking walkways or damaging nearby belongings. The best setup depends on the number of bikes, their weight, and how often you ride.
Options include:
- Floor stands for frequent access
- Wall hooks for saving floor space
- Horizontal wall racks for one or two bicycles
- Freestanding vertical racks for multiple bikes
- Ceiling systems for bikes used less often
Follow the rack manufacturer’s installation and weight instructions. Make sure pedals and handlebars will not scrape walls, vehicles, or other gear.
Before storing a bicycle for an extended period, clean the frame, inspect the tires, and complete any routine maintenance recommended by the manufacturer.
Keep helmets, pumps, locks, gloves, and repair tools near the bicycles. Giving accessories their own shelf or container prevents them from becoming scattered throughout the garage.
6. Support Kayaks and Paddle Gear Correctly
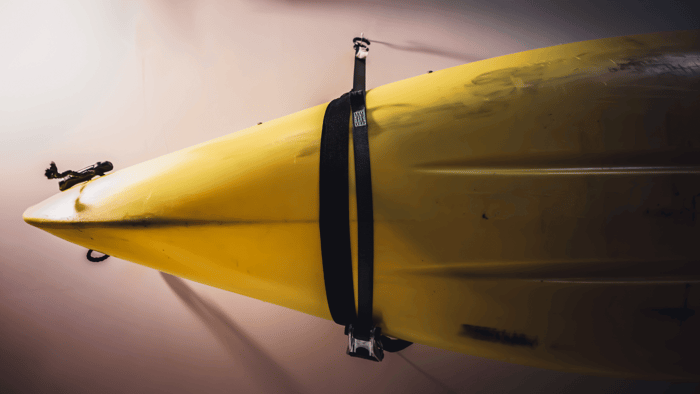
Kayak storage requires enough room to support the hull without concentrating pressure on one small area. Avoid leaving a kayak where it can be stepped over, leaned against unstable items, or buried beneath other equipment.
Use a rack or padded support designed for the kayak’s size and weight. Follow the manufacturer’s recommendations for positioning, and do not stack heavy bins on top of the hull.
Before storage:
- Rinse away sand, dirt, or salt residue
- Allow the kayak to dry completely
- Remove loose accessories
- Store paddles where they will not bend
- Keep life jackets dry and loosely arranged
- Place straps and small accessories in a labeled container
If you own more than one boat, label paddles, seats, and accessories by kayak. This prevents pieces from getting mixed together and makes loading for the next trip easier.
7. Use Vertical Space and Keep an Inventory
Large outdoor items can consume an entire room when they are stored only on the floor. Wall shelving, pegboards, hooks, and freestanding racks can create space while keeping equipment visible.
Use vertical storage for items such as:
- Backpacks
- Folding chairs
- Trekking poles
- Helmets
- Paddles
- Snowshoes
- Beach gear
- Empty duffel bags
Keep the heaviest items low and place lightweight equipment higher. Avoid hanging equipment from a strap, loop, or handle that was not designed to support its full weight.
Leave enough room to remove one item without pulling down everything around it. The best storage solutions for outdoor gear are easy to maintain after a trip, not just attractive when first installed.
A basic inventory can also prevent duplicate purchases. Number your bins, take a quick photo of the contents, and keep a note on your phone showing where each category is stored.
Create one visible repair zone rather than returning damaged gear to general storage. Set a date to repair, replace, or donate each item so unfinished projects do not build up.
8. Decide Whether Off-Site Storage Fits Your Needs
When closets, spare rooms, and garages are already full, self storage may provide more room for bulky or seasonal equipment. It can be useful for items you want to keep but do not need every day.
Self storage for outdoor equipment works best when the space is arranged around access. Keep frequently used gear near the front, group equipment by activity, and leave room to reach larger items without unloading everything.
Before choosing off-site storage, consider:
- The dimensions of your largest equipment
- How often you expect to retrieve it
- Whether shelves or freestanding racks would help
- Which items should remain at home
- The facility’s rules for the equipment you plan to store
Pack gear only after it is clean and dry. Use labels and an inventory so you know what is stored and where it is located.
These storage solutions for outdoor gear can help you create more room at home without losing track of equipment used only during certain seasons.
Common Outdoor Gear Storage Mistakes
Even a well-planned space can become cluttered again when equipment is returned carelessly. Watch for these common mistakes:
- Packing wet tents, life jackets, or clothing
- Leaving food residue in coolers or cookware
- Compressing sleeping bags for long periods
- Stacking heavy bins on fragile equipment
- Creating containers that are too heavy to move
- Storing damaged gear without a repair plan
- Blocking frequently used items with seasonal equipment
- Leaving small accessories loose and unlabeled
- Buying storage products before measuring the space
A practical system should be easy to repeat. Give each category a clear location and return equipment to that location after cleaning.
FAQs
What is the best way to organize outdoor gear at home?
Group equipment by activity, then separate frequently used items from seasonal gear. Use shelves, hooks, racks, and labeled containers so each category has a clear place.
Should camping gear be stored in plastic bins?
Plastic bins can work well for hard goods and small accessories, but not every item should remain sealed or compressed. Make sure gear is completely dry and follow the manufacturer’s storage instructions for tents, sleeping bags, and technical fabrics.
How should I store a sleeping bag between trips?
Clean and dry the sleeping bag according to its care instructions. Instead of leaving it tightly compressed, place it in a roomy storage sack or breathable bag when possible.
What is the best way to store bikes in a small space?
Wall hooks, vertical racks, and freestanding multi-bike systems can reduce the amount of floor space bicycles use. Choose a system rated for the bicycle’s weight and install it according to the manufacturer’s directions.
How should I store a kayak when it is not in use?
Clean and dry the kayak, remove loose accessories, and support it with a rack or padded system suited to its size and weight. Avoid placing heavy equipment on top of the hull.
When does a storage unit make sense for outdoor equipment?
Off-site storage may help when bulky or seasonal gear is crowding areas you use every day. Consider the size of the equipment, how often you need access, and whether the space can be arranged for easy retrieval.
Keep Your Gear Ready for the Next Trip
The best storage solutions for outdoor gear are simple enough to use after every adventure. Clean and dry equipment, group it by activity, support large items properly, and keep frequently used gear easy to reach.
A thoughtful system can create more usable space at home while making trip preparation less frustrating. Ready to clear some room? Explore available storage options and find a solution that fits your equipment and routine.